What to Do for Water Damage: 7 Steps to Take Now
Table of Contents
First Steps for Water Damage: Safety and Shutting Off the Water
Kill the Power and Watch for Hazards
Find the Leak and Close the Water Intake Valve
Removing Standing Water and Starting Structural Drying
Extraction Tools: Wet Vac and Air Movers
Dehumidification and Moisture Control
Signs of Hidden Water Damage You Should Not Ignore
Water Types, Contaminants, and What Needs Disinfecting
The Water Damage Insurance Claim Process, Step by Step
The Documentation Workflow
What Your Policy Actually Requires
Adjuster Estimate vs. Contractor Estimate
Working With the Adjuster
How Long Does Water Damage Restoration Take?
DIY or Call a Professional? The Threshold to Know
The Three Questions That Decide It
The Decision Matrix
Why the Threshold Matters Beyond Cleanup
What a Pro Actually Does That You Cannot
Frequently Asked Questions
Last Updated: September 27, 2026
First Steps for Water Damage: Safety and Shutting Off the Water
Water damage gets worse by the minute. Clean water turns into a mold problem in 24 to 48 hours, so the first hour matters more than the next ten. This guide from Rapid Refurb walks you through what to do for water damage, step by step, from killing the power to filing your claim. Get these seven steps right and you save yourself thousands in repairs.
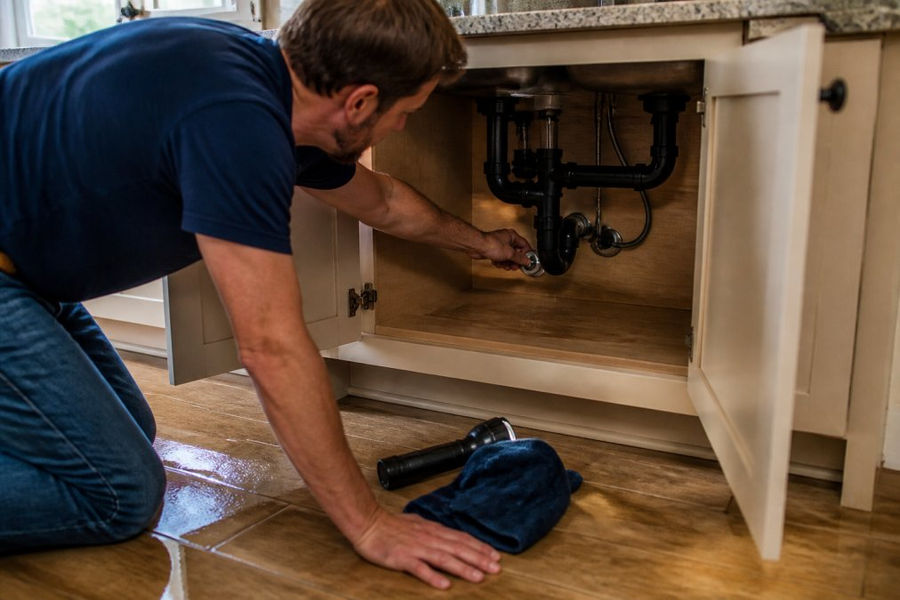
Kill the Power and Watch for Hazards
Shut off the electricity before you touch anything wet. Water and live current do not mix, and a flooded room can carry a charge you cannot see.
Never wade into standing water near outlets, appliances, or downed cords
Turn off the breaker for the flooded area at your main panel
If the panel itself is wet or sparking, leave the house and call an electrician
Watch for sagging ceilings, soft floors, and sharp debris
Find the Leak and Close the Water Intake Valve
Stop the water at its source. A burst supply line or failed water intake valve will keep dumping water until you close it.
Locate your main water shutoff, usually near the street or where the line enters the house
Turn the valve clockwise until it stops
For a toilet or sink, close the local shutoff behind or beneath the fixture
Open a low faucet to drain pressure from the pipes
Removing Standing Water and Starting Structural Drying
The clock is running. Mold can begin to grow within a day or two of a leak, so removing standing water and starting structural drying fast is the difference between a cleanup and a rebuild. Water mitigation is a race, and every hour counts.
Extraction Tools: Wet Vac and Air Movers
A wet vac pulls water out of carpet and hard floors. Air movers then push air across wet surfaces to speed evaporation.
Use a wet vac for shallow standing water and soaked carpet
Set air movers to blow across, not straight down, at walls and floors
Open windows and doors when humidity outside is low
Pull up wet rugs and move furniture off damp flooring
Dehumidification and Moisture Control
Dehumidifiers pull water vapor out of the air so wet materials can dry. Without them, you are just moving moisture around the room.
Run dehumidifiers in every affected room
Keep indoor relative humidity under control, ideally below 50%
Check progress with a hygrometer, a cheap meter that reads moisture in the air
Use thermal imaging or moisture mapping to find water hiding behind walls
Watch Out Skipping dehumidification is the most common DIY mistake. Damp air re-soaks drywall and subfloor, and mold growth shows up days later. By then, you are looking at demolition instead of drying.
Signs of Hidden Water Damage You Should Not Ignore
Some damage hides behind walls and under floors. Catch these signs of hidden water damage early and you avoid a much bigger repair bill.
Watch for:
A musty smell that will not go away
Warped or bubbling paint and drywall
Soft, spongy spots in the floor or subfloor
Stained or sagging ceilings
Peeling wallpaper and sticking doors
A spike in your water bill with no clear cause
Water Types, Contaminants, and What Needs Disinfecting
Not all floodwater is the same. The category of water decides how you clean it and what you throw away.
Water Type | Source | Risk Level | What To Do |
Category 1 | Clean supply lines, rain | Low | Dry and disinfect |
Category 2 | Washing machine, toilet overflow | Moderate | Disinfect, may need removal |
Category 3 | Sewage backup, floodwater | Severe | Discard porous materials |
The Water Damage Insurance Claim Process, Step by Step
Most homeowner policies cover sudden and accidental water damage, but they almost never cover damage the insurer can attribute to neglect or a long-running leak. That distinction is decided by what you document and when. Start the paperwork the same day you find the water.
The Documentation Workflow
Build the claim file before you clean anything. Once wet drywall is in a dumpster, the damage is no longer visible, and adjusters deny claims they cannot see.
Photograph wide, then close. Shoot each affected room from the doorway, then move in for close-ups of the water line, stained drywall, buckled flooring, and the failed source (the split supply line, the cracked valve, the overflowing appliance).
Shoot a slow video walkthrough. A 60-second pass through each room, narrating what you see, is the single best proof you can collect. It captures scale and context that stills miss.
Write a dated loss log. Note when you found the water, when you shut it off, when extraction started, and what you threw away. Timestamps support the "sudden and accidental" finding.
Inventory damaged contents. List each item, its approximate age, and its replacement cost. Keep damaged items until the adjuster has seen them or released them in writing.
Save every receipt. Hotel nights, fans, dehumidifier rentals, plastic sheeting, and emergency supplies are often reimbursable under additional living expense or as claim-related costs.
Get a written scope from a licensed restoration contractor. This is the estimate the adjuster compares against their own.
What Your Policy Actually Requires
Read the "Duties After Loss" section of your policy. It typically obligates you to notify the insurer promptly, protect the property from further damage, and cooperate with the investigation. Two practical consequences follow:
Mitigation is not optional. You are expected to stop the damage from spreading, extraction, drying, tarping. Reasonable mitigation costs are generally covered; failing to mitigate can reduce your payout.
Prompt notice matters. Delays give an insurer room to argue the damage worsened because of you, not the leak.
Adjuster Estimate vs. Contractor Estimate
These two numbers rarely match on the first pass. The adjuster writes to a standardized estimating platform; your contractor writes to what the job actually needs. Common gaps include:
Drying equipment counts and the number of days it runs
Whether baseboards, drywall, or insulation must be removed and replaced
Whether the subfloor can be dried in place or must come up
Antimicrobial treatment and disposal of contaminated porous materials
Working With the Adjuster
Meet the adjuster on site so nothing gets missed and you can point out hidden moisture you have already mapped.
Provide your moisture readings, thermal images, and the contractor scope up front.
Keep everything in writing, email summaries of phone calls.
If the offer seems low, request a re-inspection with your contractor present before accepting.
Pro Tip Document with your phone before you clean anything. Insurers deny claims when damage is not visible in photos. A 60-second video walkthrough of each room, plus a dated loss log, is the strongest proof package a homeowner can assemble.
This is where a claim partner helps. Rapid Refurb communicates directly with adjusters to ensure your repairs are approved and completed efficiently, so you are not stuck translating contractor language for an insurance company.
How Long Does Water Damage Restoration Take?
Most jobs take three to five days of drying, plus repair time on top. How long does water damage restoration take overall? It depends on the water category, how much area is wet, and how fast drying starts.
Scope | Drying Time | Full Repair |
Small leak, one room | 3-4 days | 1-2 weeks |
Multiple rooms | 5-7 days | 2-4 weeks |
Flood or sewage | 1-2 weeks | 4-8 weeks |
DIY or Call a Professional? The Threshold to Know
Most homeowners can handle a small, clean-water spill. The trouble starts in the gray zone, a leak that looks contained but has been running behind a wall for a week. Use the framework below instead of guessing.
The Three Questions That Decide It
1. What category is the water?
Category 1 (clean): supply lines, rain intrusion, a failed ice maker line. Generally DIY-able if contained.
Category 2 (grey): washing machine discharge, toilet overflow without solids, dishwasher leaks. Contains some contaminants; disinfecting is required and porous materials may need removal.
Category 3 (black): sewage backup, floodwater, any water that has sat long enough to grow bacteria. Grossly contaminated. This is a professional job, the health risk is not worth a DIY gamble.
2. How far has the water traveled?
Water wicks. A spill that looks like it covers one room often has migrated into the wall cavity, under the subfloor, or into the ceiling below. If water reached drywall, insulation, or the subfloor, drying in place requires equipment most homeowners do not own, commercial air movers, a low-grain refrigerant dehumidifier, and moisture meters to verify progress.
3. How long has it been wet?
The Decision Matrix
Situation | DIY | Professional |
Category 1, contained to one room, found within hours | Yes | , |
Category 1, soaked into walls or subfloor | , | Yes |
Category 2, any size | Disinfect only if small and hard-surfaced | Yes for porous materials |
Category 3, any size | No | Yes |
Visible mold or musty odor | No | Yes |
Water near electrical panels or outlets | No | Yes |
Source cannot be found or stopped | No | Yes |
More than one room affected | , | Yes |
Why the Threshold Matters Beyond Cleanup
Calling a professional early is not just about drying faster. A licensed remediation crew produces the documentation, moisture maps, daily readings, equipment logs, that insurers expect to see. A DIY job with no records is far easier for an adjuster to dispute. Professional mitigation also carries liability coverage if something goes wrong, which a homeowner's own efforts do not.
What a Pro Actually Does That You Cannot
Moisture mapping: thermal imaging and pin meters locate water behind walls and under floors that the eye cannot see.
Containment: plastic barriers and negative air pressure keep mold spores and dust from spreading to clean areas.
HEPA filtration and antimicrobial treatment: addresses contamination, not just wetness.
Verification drying: daily readings confirm materials have reached dry standard before reconstruction begins, the step most DIY jobs skip.
Key Takeaway If the water is Category 2 or 3, has been wet more than a day, or has reached walls, ceilings, or the subfloor, call a professional. For a contained Category 1 spill caught within hours, a wet vac, air movers, and a dehumidifier can handle it, but document everything either way.
Rapid Refurb handles water, storm, and fire restoration for homeowners, and as a licensed and insured team, we manage the whole project from drying to finished repairs.
Frequently Asked Questions
What are the first steps to take when you find water damage?
Shut off the water at the main valve or the fixture's water intake valve, then cut power to any wet rooms at the breaker panel. Photograph everything before you move it. Remove standing water with a wet vac if it is safe, and start air movers and a dehumidifier. Call your insurer the same day. Water damage worsens within hours, so the first 24 to 48 hours decide how much of your home can be saved.
Will water damage go away on its own?
No. Water soaks into drywall, subfloor, and other porous materials and stays there. Without extraction, dehumidification, and airflow, that trapped moisture feeds mold growth within 24 to 48 hours and weakens structural materials. A small spill near a baseboard can hide moisture behind the wall for weeks. If you are not sure how far water traveled, a moisture meter or thermal imaging scan will show what your eyes cannot.
Can I fix water damage myself?
You can handle a small, clean-water spill from a supply line if you dry it within a day, using a wet vac, air movers, and a dehumidifier. Call a professional when the water is Category 2 or 3 (appliance discharge, sewage backup, or floodwater), when it covers more than a small area, when it reached the subfloor or wall cavities, or when mold is already visible. Sewage and floodwater carry contaminants that require proper sanitization and, often, demolition of soaked materials.
Will insurance pay for water leak damage?
Most homeowners policies cover sudden and accidental water damage, like a burst pipe or failed water heater, but exclude gradual leaks and poor maintenance. Your water damage insurance claim process starts with documenting the loss: photos, video, a written inventory, and receipts. Keep damaged items until the adjuster sees them. If part of your claim is denied, ask for the specific policy language in writing and request a re-inspection with your contractor present.
Water damage never waits, and neither should you. The longer water sits, the more it costs to fix, and the harder your claim gets to prove. Rapid Refurb is a licensed and insured restoration team that acts as your claim partner, communicating directly with adjusters to get repairs approved and completed. From emergency water mitigation to full interior remodeling, we handle every detail so you can focus on getting back to normal. Get a quote from Rapid Refurb and start your restoration today.
Get Quote


Comments