Steps for Fire Damage Restoration: A Homeowner's Guide
Table of Contents
What to Do After a House Fire: Immediate Safety and Emergency Response
Before You Re-Enter: Safety Guidance and Protective Equipment
Securing the Property and Preventing Further Damage
The Fire Damage Restoration Process: From Assessment to Repair
Initial Damage Assessment and Inspection
Water Extraction, Drying, and Dehumidification
Smoke, Soot, and Odor Removal
Fire Restoration Timeline: What to Expect and When
How to File a Fire Damage Insurance Claim: A Step-by-Step Guide
Build Your Evidence File Before Cleanup Starts
What to Record Before You Remove Anything
Working With Your Adjuster
If Your Claim Is Denied or Underpaid
DIY vs. Professional Fire Damage Restoration: What You Can Do Yourself
The Health Risks That Decide the Line
Tasks Most Homeowners Can Safely Handle
Tasks That Require Trained Professionals
A Simple Decision Framework
When to Call a Professional Immediately
Prioritizing Salvageable Belongings and Contents Pack-Out
Conclusion: Restoring Your Home and Moving Forward
Frequently Asked Questions
Last Updated: October 7, 2026
What to Do After a House Fire: Immediate Safety and Emergency Response
The first thing to do after a house fire is get everyone to safety and call 911.

Once the fire is out, fire damage restoration begins with one rule: safety first, property second.
Here is what to do right away:
Call 911 if you have not already, and report anyone missing
Get medical help for burns or smoke inhalation
Stay with a neighbor, friend, or family member
The American Red Cross home fire safety guidance recommends having a post-fire plan ready before you ever need it.
Before You Re-Enter: Safety Guidance and Protective Equipment
Fire damage restoration starts with a safe re-entry, which only happens when a fire official clears the building. Even then, smoke and soot carry fine particles that irritate your lungs, and wet, charred materials hide electrical hazards. Never flip a breaker or light a match.
If you must go in briefly, wear:
An N95 or P100 respirator
Heavy work gloves
Long sleeves and pants
Watch Out Never re-enter a fire-damaged home to grab belongings before a fire official clears it. Floors can collapse and hidden hot spots can reignite, and the risk is not worth any item left inside.
Securing the Property and Preventing Further Damage
Once the site is safe, stop more damage. Broken windows and open roofs let in rain, turning a fire claim into a fire-and-water claim.
Common steps include:
Board up windows and doors
Tarp damaged roof sections
Shut off water and gas if advised
We are licensed and insured, handling board-up, water damage, fire restoration, and structural work.
The Fire Damage Restoration Process: From Assessment to Repair
The fire damage restoration process follows a set sequence: assess, extract water, dry, clean soot, remove odor, then repair. Skipping a stage causes mold or a smell that keeps coming back.
Initial Damage Assessment and Inspection
A full inspection maps what the fire touched and what the water touched, firefighting water often causes more damage than the flames.
A good inspection checks:
Structural damage to walls and ceilings
Roof and floor integrity
Water saturation in drywall and insulation
If we find structural damage not in the original estimate, we document it and send it to your adjuster before touching it.
Water Extraction, Drying, and Dehumidification
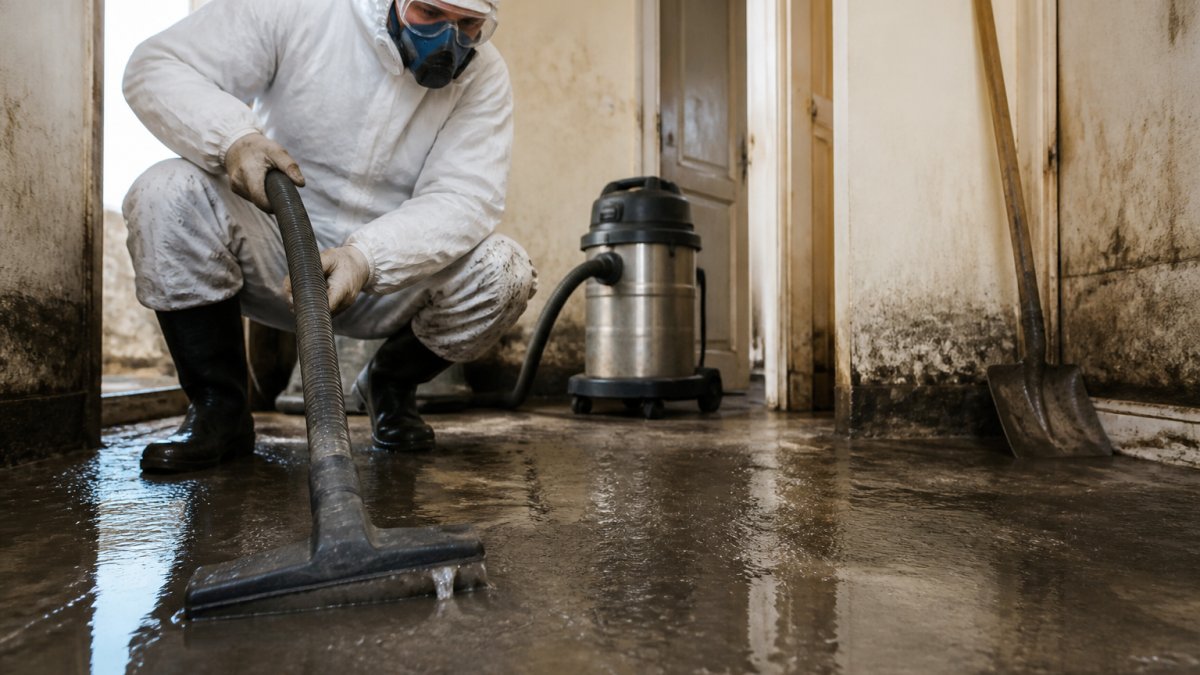
Standing water comes out first. Crews pump water from floors, then set up dehumidifiers and air movers to dry what is left. Wet drywall and wood can grow mold in days, and drying too slowly means a second round of damage and a second fight with your insurer. Expect several days of drying with monitoring visits.
Smoke, Soot, and Odor Removal
Soot settles on every surface, even in rooms the fire never reached. Cleaning starts with pre-cleaning to loosen residue, then content cleaning for salvageable items.
Odor removal is its own job. Deodorization uses air scrubbers and treatments to pull smoke smell out of walls, carpets, and furniture. A surface wipe-down alone will not do it.
Fire Restoration Timeline: What to Expect and When
A typical fire restoration timeline runs from a few weeks for minor damage to several months for major structural repair: the first week is emergency work, followed by drying, cleaning, and repairs.
Here is a rough stage-by-stage view:
Stage | Typical Duration | What Happens |
Emergency response | 1-2 days | Board-up, safety check, water removal |
Assessment and inspection | 1-3 days | Damage documentation, claim estimate |
Drying and dehumidification | 3-7 days | Pumps, dehumidifiers, moisture monitoring |
Soot and odor cleanup | 1-2 weeks | Pre-cleaning, content cleaning, deodorization |
Repair and rebuild | Weeks to months | Structural repair, walls, flooring, finishes |
The biggest delay is rarely the work itself, it is the wait for claim approval. A restoration team that talks to your adjuster directly can help streamline that process.
How to File a Fire Damage Insurance Claim: A Step-by-Step Guide
A fire damage insurance claim goes faster when you report it early and document everything before anything is moved, cleaned, or thrown away. Call your insurer the same day if you can, and get the claim number in writing.
Follow these steps:
Report the loss and get a claim number
Ask what your policy covers, what your deductible is, and whether you have additional living expenses (ALE) coverage for hotel, meals, and laundry
Keep every receipt, including hotel and food costs, and label them by date
Do not throw away damaged items until your adjuster says so in writing
Get a written estimate from a licensed contractor
Review the adjuster's report line by line for missed damage
Ask questions before you sign anything, and request a copy of every document you sign
Build Your Evidence File Before Cleanup Starts
The single biggest mistake homeowners make is letting cleanup begin before the damage is documented. Once soot is wiped or debris is hauled, that loss is hard to prove. Before anyone touches the property, build a claim file:
Room-by-room photo set: wide shot of each room, then close-ups of damage on walls, ceilings, floors, and door frames
Video walkthrough: narrate what you see, say the date and time out loud, and pan slowly so details stay in frame
Inventory list: item description, approximate age, brand, model or serial number where visible, and replacement cost estimate
A simple spreadsheet works fine: one row per item, with columns for room, description, age, condition, and estimated value. Adjusters process claims faster when the inventory is organized by room.
Pro Tip Photograph every room before cleanup starts, including closets and drawers. Adjusters approve claims faster when the damage is documented room by room, not just in wide shots.
What to Record Before You Remove Anything
Some items must leave the home quickly for safety or to prevent mold, but that does not mean you lose the claim. Before an item leaves the property, record:
Two photos: one in place, one showing any damage up close
The item's location in the home
Whether it is being discarded, cleaned, or packed out for storage
If a restoration company performs a contents pack-out, ask for an itemized inventory of everything they take. That inventory becomes part of your claim file and protects you if an item is damaged or lost in storage.
Working With Your Adjuster
Your adjuster authorizes payment, so keep the relationship practical and documented:
Ask for the adjuster's direct phone number and email on the first call
Confirm whether the adjuster will inspect in person or review photos and video remotely
Send new damage discoveries in writing as soon as you find them, with photos attached
The first estimate often misses hidden damage behind walls, under floors, or in the HVAC system. That is normal. The fix is documentation, not confrontation: send photos, request a re-inspection, and keep a written log of every conversation.
If Your Claim Is Denied or Underpaid
You have options. The North Carolina Department of Insurance publishes a consumer guide to filing property claims and what to do if a claim is denied, and similar guides exist from your state's insurance regulator.
Before you escalate, gather your evidence file, the adjuster's written scope, and your contractor's estimate. A clear paper trail resolves most disputes faster than a phone argument.
DIY vs. Professional Fire Damage Restoration: What You Can Do Yourself
Some tasks are safe to do yourself; others need certified professionals and equipment you cannot rent at a hardware store. The line is not about difficulty but health risk, hidden damage, and whether the work needs documentation for your claim.
The Health Risks That Decide the Line
Smoke residue and soot are not just dirt. Ash and debris from a structure fire can contain harmful substances, and the U.S. Environmental Protection Agency notes that fire debris and ash can contain materials that make cleanup more than a simple trash-hauling job.
That means the decision is not only "can I do this?" but "should I be breathing near this?" If the answer is uncertain, treat it as professional work.
Tasks Most Homeowners Can Safely Handle
These are low-risk, high-value actions that also strengthen your claim:
Removing undamaged items you can safely reach, after photographing them in place
Taking photos and video for your claim, room by room
Calling your insurer and tracking paperwork in one folder or spreadsheet
Even for these tasks, wear an N95 or P100 respirator, gloves, long sleeves, and eye protection. Soot travels, and a quick wipe-down can stir particles into the air.
Tasks That Require Trained Professionals
Leave these to certified remediation and restoration crews:
Water extraction and structural drying, which require moisture meters, dehumidifiers, and air movers sized to the space
Soot and smoke residue removal from walls, ceilings, and HVAC systems
Odor removal and deodorization, which needs air scrubbers and treatments that reach into porous materials
A key reason these belong to the pros is verification: drying is not done when the surface feels dry, but when moisture readings return to normal, which requires instruments and a written record your adjuster will accept.
A Simple Decision Framework
When you are unsure whether a task is DIY or professional, ask these four questions:
Does it involve water, soot, or odor in porous materials? If yes, it is professional work.
Does it require a permit, licensed trade, or inspection? If yes, it is professional work.
Will I need documentation that the work was done correctly? If yes, a certified crew gives you that record.
Am I unsure about my own safety or air quality? If yes, stop and call a professional.
If a task fails any of these, the cost of a professional is usually less than the cost of doing it twice, or of a denied claim.
Watch Out Do not run a shop vacuum, box fan, or household dehumidifier in a soot-contaminated space. These can spread fine particles through the home and push smoke odor deeper into materials.
When to Call a Professional Immediately
Call a certified restoration team right away if you see any of the following:
Standing water or saturated drywall and insulation
A persistent smoke smell more than a few days after the fire
Visible mold or musty odors
These conditions tend to get worse, not better, and are the ones most likely to turn a covered claim into a disputed one if handled without documentation.
Prioritizing Salvageable Belongings and Contents Pack-Out
Not everything can be saved, so prioritize: items with sentimental or financial value first, then everyday essentials. A contents pack-out moves salvageable belongings to a secure facility for cleaning and storage while your home is repaired.
Sort items into three groups:
Save now: documents, jewelry, medication, electronics
Assess: furniture, clothing, and decor that may clean up
Replace: items that are charred, waterlogged, or moldy
Photograph each item you remove, and keep a running list for your claim.
Conclusion: Restoring Your Home and Moving Forward
A house fire leaves behind more than damage, it leaves a long list of decisions, most tied to your insurance claim. Rapid Refurb takes that weight off your plate. We communicate directly with your adjuster, document every stage of the work, and handle repairs from board-up to final finish.
Get a quote from Rapid Refurb and let us handle the details while you focus on getting back to normal.
Frequently Asked Questions
What are the steps involved in the fire damage restoration process?
The fire damage restoration process typically follows a sequence: emergency response and safety assessment, securing the property with board-up and tarping, water extraction from firefighting efforts, drying and dehumidification, smoke and soot removal, odor deodorization, content cleaning or pack-out, and structural repairs. Each stage builds on the last, and skipping steps like water extraction can lead to mold growth. A certified professional restoration team can manage the entire process and coordinate with your insurance company.
How long does fire damage restoration take?
The fire restoration timeline depends on the extent of structural damage, smoke penetration, and water used to extinguish the fire. Minor fires with limited smoke damage may be restored in a few weeks, while major fires requiring structural rebuilding can take several months. Water extraction and drying alone often take 3 to 5 days. Your insurance claim approval and contractor scheduling also affect the total duration. Ask your restoration team for a written timeline after the initial damage assessment.
When is it safe to return to a fire-damaged home?
You should not re-enter a fire-damaged home until the fire department or a qualified inspector confirms it is structurally safe. Even after the fire is out, risks remain: hot spots, weakened floors, electrical hazards, and toxic soot particles. Wear an N95 respirator, gloves, and eye protection if you must enter briefly. Children, pregnant women, and pets should stay away until professional cleaning and deodorization are complete. When in doubt, wait for clearance from a certified professional.
Can smoke damage be cleaned from walls and belongings?
Smoke damage can often be cleaned from walls, ceilings, and many belongings, but the method depends on the material. Porous surfaces like drywall, insulation, and upholstered furniture may need removal or professional cleaning. Hard surfaces can be cleaned with specialized soot sponges and degreasers. Contents pack-out allows salvageable belongings to be cleaned off-site. Odor removal often requires thermal fogging or ozone treatment. Attempting DIY smoke cleanup without proper equipment can spread soot and make the damage worse.
Get Quote



Comments