Restoration Services for Storm Damage: 2026 Guide
Table of Contents
What Storm Damage Restoration Services Actually Do
Emergency Response and Damage Assessment
Mitigation vs Restoration Services: What's the Difference?
Why the Sequence Matters for Your Claim
How to File a Storm Damage Insurance Claim
The Adjuster-Ready Documentation Checklist
What to Say, and Not Say, to the Adjuster
Public Adjusters and When to Bring One In
Documenting Damage Before Cleanup Begins
Hiring Licensed Restoration Contractors: What to Verify
DIY vs Professional Restoration: Where the Line Falls
Health Hazards After a Storm Most Homeowners Miss
Hidden Electrical Hazards
Gas Leaks and Carbon Monoxide
Contaminated Floodwater
Structural Instability
Mold: The 24-to-48-Hour Window
Sharp Debris and Tetanus Risk
Preventative Maintenance That Reduces Storm Damage
Frequently Asked Questions
Last Updated: September 16, 2026
What Storm Damage Restoration Services Actually Do
Storm damage rarely announces how bad it is. A missing shingle looks cosmetic until water reaches the attic insulation; a wet ceiling looks minor until the drywall sags. That gap between visible and actual damage is where restoration services for storm damage earn their keep.
Emergency Response and Damage Assessment
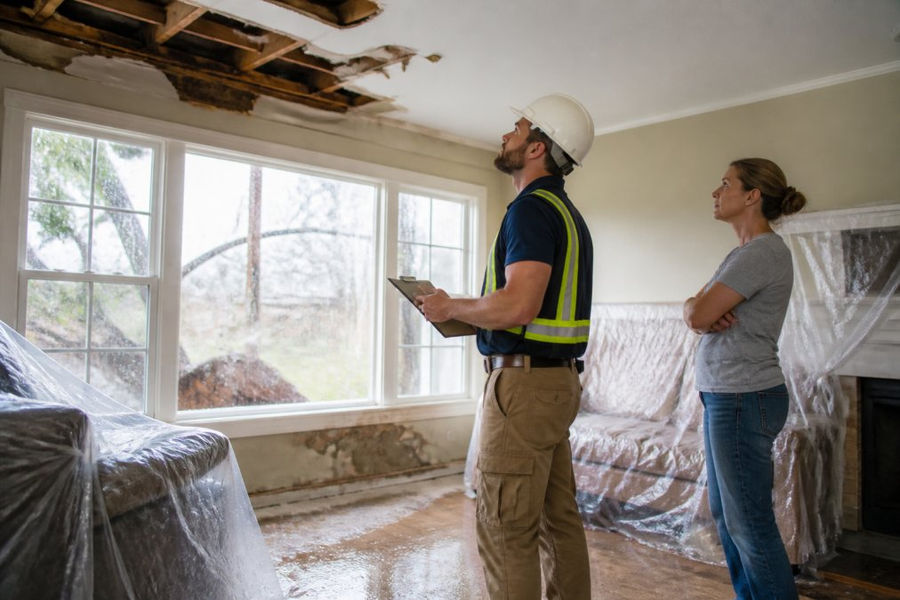
Emergency response begins with a trained assessment. A certified technician checks the roof, attic, walls, flooring, and foundation for water intrusion, structural movement, and hidden moisture.
Mitigation vs Restoration Services: What's the Difference?
Mitigation stops the damage from getting worse; restoration repairs what already happened. Confusing these two phases is one of the most common mistakes homeowners make when filing a claim.
Why the Sequence Matters for Your Claim
Insurance adjusters look for a clear chain of causation. If mitigation wasn't documented before restoration began, the adjuster can't separate storm damage from repair damage.
Here's the sequence that protects your claim:
Emergency response and on-site assessment
Mitigation (stabilize, extract, dry, secure)
Documentation of all affected materials
Adjuster review and scope approval
Restoration and reconstruction
Final walkthrough and claim closeout
Watch Out A common mistake is letting a contractor start demolition before the adjuster has seen the damage. Once materials are in a dumpster, you've lost your evidence, and the adjuster can deny or reduce the claim.
How to File a Storm Damage Insurance Claim
Filing a storm damage insurance claim starts with documentation, before you call your insurer. Photograph everything, the water stain on the ceiling, swollen baseboards, the tree branch on the roof. Timestamped photos from the day of the storm carry far more weight than photos taken two weeks later.
The Adjuster-Ready Documentation Checklist
Most guides tell you to 'take photos.' That's not enough, adjusters work from a specific set of evidence, and a missing piece lets the carrier reduce or deny the claim. Build your file in this order:
Date and time anchor. Before you photograph anything else, take one wide shot that includes a clock, phone screen, or newspaper in frame. This establishes when the damage existed.
Exterior envelope. Roof (from the ground and, if safe, from a ladder), siding, gutters, downspouts, windows, doors, and foundation. Shoot each elevation separately.
Water intrusion points. Where water entered, missing shingles, cracked flashing, failed window seals, foundation cracks. Photograph the entry point and the interior damage it caused in the same session.
Interior room-by-room. Wide shot of each room first, then close-ups of each damaged item. Include ceilings, walls, floors, and baseboards.
Contents inventory. List damaged personal property with brand, model, approximate age, and replacement cost. Photograph each item before you discard it.
Moisture readings. If you own or can borrow a moisture meter, photograph the reading next to the affected material. This is the single most persuasive evidence that damage is more than surface-level.
Receipts. Emergency repairs (tarps, board-up, hotel, meals during displacement) are usually reimbursable under loss-of-use coverage. Keep every receipt.
Contractor estimates. Get at least two written, itemized estimates. Adjusters compare them against their own scope.
Pro Tip Take a photo of your utility meter and a clock or phone screen in the same frame. It creates a timestamped anchor that adjusters can't dispute later.
What to Say, and Not Say, to the Adjuster
When the adjuster arrives, walk them through the damage in the order you documented it: entry point first, then the water path. Don't speculate about cause ('I think the wind did it'), describe what you observed ('the shingles on the north slope were intact before the storm and missing after').
Public Adjusters and When to Bring One In
If your claim is denied, underpaid, or stalled, a public adjuster can represent you. They work for you, not the carrier, and charge a percentage of the final settlement. They can be useful when causation is disputed.
Documenting Damage Before Cleanup Begins
Documentation is the most valuable thing you can do in the first 48 hours. A thorough record includes wide shots and close-ups of each affected room, exterior photos (roof, siding, gutters, foundation), narrated video walkthroughs, receipts for emergency repairs or lodging, and a written inventory of damaged property.
Watch Out Do not throw anything away until the adjuster has seen it or you have photographed and inventoried it. Once materials are in a dumpster, you've lost your evidence, and the adjuster can deny or reduce the claim.
Hiring Licensed Restoration Contractors: What to Verify
Hiring licensed restoration contractors comes down to four checks: license, insurance, certifications, and written scope. Ask for all four before you sign anything.
License: Verify the contractor's license through your state's licensing board. Ask for the license number in writing.
Insurance: Request a certificate of insurance showing general liability and workers' compensation coverage. Call the insurer to confirm it's active.
Certifications: For water and mold work, look for technicians certified in water damage restoration and applied microbial remediation.
Written scope: The estimate should itemize materials, labor, and timeline. Verbal estimates are worthless in a claim dispute.
What to Verify | Why It Matters | Red Flag |
State license | Legal authorization to work | "We don't need one for this job" |
Liability insurance | Covers accidental damage | Can't produce a certificate |
Workers' comp | Covers crew injuries | Crew listed as "subcontractors" |
Written itemized scope | Protects your claim | Only a verbal estimate |
Certifications | Safe water and mold work | No proof of training |
DIY vs Professional Restoration: Where the Line Falls
DIY makes sense for cosmetic cleanup; professional restoration is required for water intrusion, structural integrity, or mold. The line isn't difficulty, it's what's hidden behind the wall.
Key Takeaway The DIY-versus-professional decision hinges on one question: is the damage visible or hidden? Visible surface damage is often DIY-friendly. Hidden moisture, structural movement, and mold require professional equipment and documentation.
Health Hazards After a Storm Most Homeowners Miss
Post-storm health hazards go beyond slipping on a wet floor. The ones that send people to the hospital are usually invisible: energized water, gases, and contamination that doesn't announce itself.
Hidden Electrical Hazards
Standing water and wet materials conduct electricity. After a storm, wiring, outlets, and appliances can stay energized even with the main breaker off, because some circuits (like service entrance conductors) remain live. Never wade into a flooded basement or touch a wet panel; if you smell burning or see scorch marks, leave and call the utility.
Gas Leaks and Carbon Monoxide
Gas and propane lines can be damaged by shifting foundations, falling trees, or debris. If you smell rotten eggs, hear hissing, or see a damaged meter, don't flip switches or use a phone inside, leave and call the gas utility from outside.
Contaminated Floodwater
Floodwater is not 'just water.' It can carry sewage, agricultural runoff, industrial chemicals, and bacteria like E. coli and Vibrio. Assume any floodwater in your home is contaminated: wear rubber boots, gloves, and eye protection during cleanup, wash hands and tools afterward, and discard porous items that soaked, drywall, insulation, carpet, upholstered furniture.
Structural Instability
Water-damaged ceilings and floors can collapse without warning. A ceiling that sags, bulges, or shows a stain larger than a dinner plate may fail, don't walk under it or remove it yourself. Same for spongy or bouncy floors; the subfloor may be compromised.
Mold: The 24-to-48-Hour Window
Mold can begin growing on wet materials within 24 to 48 hours. Warning signs: musty odor, discoloration on drywall or ceiling tiles, and allergy-like symptoms that appear only at home. Asthma sufferers, allergy sufferers, young children, and older adults are most at risk. Don't scrub mold with bleach, the colony is usually larger than the visible patch, and disturbing it without containment spreads spores.
Sharp Debris and Tetanus Risk
Storm debris, broken glass, nails, splintered wood, metal flashing, causes puncture wounds and tetanus risk. If you haven't had a booster in 10 years, get one before cleanup, and wear thick-soled boots and heavy gloves even for 'quick' yard work.
Key Takeaway The hazards that hurt people after storms are the ones they can't see: energized water, carbon monoxide, contaminated floodwater, and mold growing behind drywall. When in doubt, treat the space as unsafe until a professional has assessed it.
Preventative Maintenance That Reduces Storm Damage
Preventative maintenance won't stop a storm, but it decides how much damage the storm does. A maintained home recovers faster and files smaller claims.
A practical pre-storm checklist:
Clean gutters and downspouts so water moves away from the foundation
Inspect the roof for lifted shingles, cracked flashing, and worn seals
Trim tree branches that overhang the roof or power lines
Check window and door seals for gaps and cracks
Test the sump pump and clear the discharge line
Confirm your insurance policy covers wind, hail, and flood
Photograph your home's current condition for future claim reference
Frequently Asked Questions
What is storm damage restoration?
Storm damage restoration is the process of returning a home to its pre-storm condition after wind, hail, water, or debris causes damage. It covers water extraction, structural stabilization, debris removal, mold remediation, and reconstruction. Restoration differs from mitigation, which stops further damage before repairs begin. A full storm damage restoration project typically starts with an on-site assessment and ends with final repairs that insurance adjusters can verify against your claim.
What's the difference between remediation and restoration?
Remediation addresses the hazard itself, such as removing mold, contaminated water, or smoke residue. Restoration rebuilds what was damaged, including drywall, flooring, cabinetry, and roofing. In practice, remediation comes first because you cannot rebuild over mold or moisture. When comparing mitigation vs restoration services, think of mitigation as stopping the damage and restoration as repairing it. Understanding this sequence helps you track what your insurance claim should cover at each stage.
How do I verify if a restoration company is licensed and insured?
Ask for the license number and verify it with your state's licensing board. Request a certificate of insurance showing general liability and workers' compensation coverage, then call the insurer to confirm the policy is active. When hiring licensed restoration contractors, also check for certifications in water damage and mold work. A legitimate contractor will provide these documents without hesitation. If a company resists or delays, that is a clear warning sign to look elsewhere.
How long does the storm damage restoration process usually take?
Timelines vary with damage severity. Water extraction and drying typically take three to five days. Structural repairs, drywall, and flooring can add several weeks. Full reconstruction after catastrophic damage may run two to three months. Insurance approval speed also affects the schedule. Ask your contractor for a written timeline with milestones, and confirm how they handle additional damage discovered mid-project so your claim can be amended before work stalls.
Get Quote


Comments